Implementing Microfrontends in GatsbyJS using Ara Framework
GatsbyJS is the most popular framework to create static websites. In the software industry, the concept of static site generators is not recent but it’s becoming more popular thanks to the recent evolution of the JavaScript technologies and the introduction of JAMstack.
GatsbyJS enable us to deliver fast and reliable websites that are easy and cheap to host in any cloud provider, for instance, Zeit, Netlify, and others are services that make easier this duty.
JAMstack and AWS Lambda
The main characteristic of JAMstack is that the computing resources are provisioned on-demand only during build-time to generate the static pages, commonly using a serverless CI/CD tool such as CircleCI or Travis CI, which free us of managing dedicated servers.
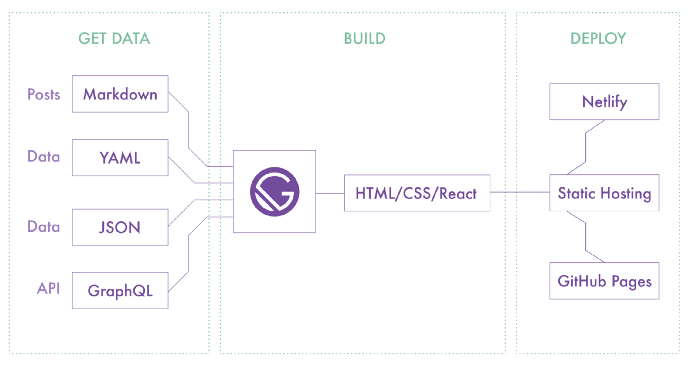
AWS Lambda works in a similar way, it runs a function triggered by a webhook, commonly using a lambda integration with other AWS services such as API Gateway, SNS, SQS and more. Following this premise, we can deploy a lambda function that generates and stores HTML inside an S3 bucket or why not, a lambda function that renders HTML on demand.
What do Microfrontends role play here?
Microfronteds like Microservices enable teams to develop and ship features independently.
The level of isolation enables us to integrate different frameworks into the same page. However it doesn’t mean that we should mix frameworks arbitrarily, we should define standard frameworks and libraries across the company.
On the other hand, Frontend technologies evolve fast and the true fact is that at some point we need to move to another framework. Therefore, Microfrontends give us the flexibility to gradually switch to another one without rebuilding the Frontend from scratch.
The scenario
We can imagine that we’re a media company that have a lot of websites shipped across the world that are maintained by different teams. We love React but we’ve fallen in love with VueJs in the last years, so it became our standard library to develop the UI.
Our product team wants to experiment with a new media website and the JAMstack fits in the solution, but we realized that the current frameworks for VueJS don’t have the necessary features that we need.
Then we discovered that GatsbyJS has what we need. But we have another problem, the new website needs to reuse some views that were developed using VueJS previously, we could migrate those views to React but we don’t have enough time and we don’t want to maintain both in the future.
Luckily one of our members recently read about Microfrontends and suggested it. We said, “why not, let’s give it a try”.
Microfrontend (Nova)
Hypernova Lambda is an implementation of Airbnb’s Hypernova for AWS Lambda. Hypernova is service to server-side render JavaScript views that are hydrated on the browser to make them dynamic, it’s also known as universal rendering.
In Ara Framework we commonly called Nova to the Hypernova services.
Creating a Microfrontend (Nova)
We need to install the Ara CLI to perform some common tasks such as generate nova services, run hypernova lambda locally and serve the client-side scripts.
npm install -g ara-cli
Once the CLI is installed we can generate a new Nova service running the following command:
ara new:nova -t vue novas/global
Output:
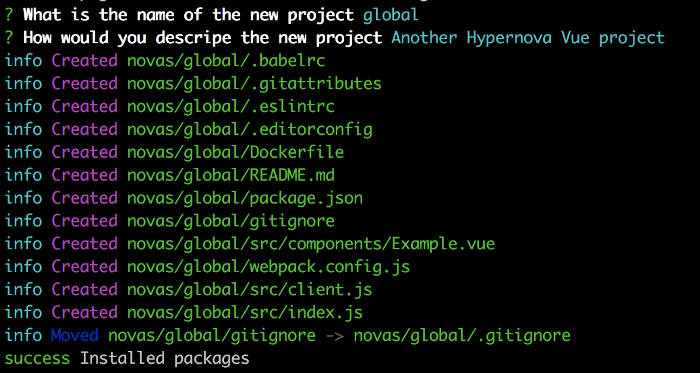
The generated project contains a basic setup. We kept it simple to make it. customizable.
Entry point:
The file src/index.js contains the entry point for the Hypernova server. It uses Express by default but we’ll implement AWS Lambda later.
import hypernova from 'hypernova/server'
import { renderVue, Vue } from 'hypernova-vue'
import express from 'express'
import path from 'path'

import Example from './components/Example.vue'

hypernova({
  devMode: process.env.NODE_ENV !== 'production',
  getComponent (name) {
    if (name === 'Example') {
      return renderVue(name, Vue.extend(Example))
    }
  },
  port: process.env.PORT || 3000,

  createApplication () {
    const app = express()

    app.use('/public', express.static(path.join(process.cwd(), 'dist')))

    return app
  }
})
Example component:
The src/components/Example.vue file renders a basic view using the title prop.
<template>
  <h1>{{title}}</h1>
</template>

<script>
export default {
  props: ['title']
}
</script>
We can run the service using this command:
yarn dev
Once the Hypernova server is running we will see the next message.
Output:

We can test the service making a POST request to http://localhost:3000/batch using the following payload:
{
  "uuid": {
    "name": "Example",
    "data": {
      "title": "Ara Framework"
    }
  }
}
The response should be something like:
{
    "success": true,
    "error": null,
    "results": {
        "uuid": {
            "name": "Example",
            "html": "<div data-hypernova-key=\"Example\" data-hypernova-id=\"cfd4b502-f9a4-4475-9168-233595ea4489\"><h1 data-server-rendered=\"true\">Ara Framework</h1></div>\n<script type=\"application/json\" data-hypernova-key=\"Example\" data-hypernova-id=\"cfd4b502-f9a4-4475-9168-233595ea4489\"><!--{\"title\":\"Ara Framework\"}--></script>",
            "meta": {},
            "duration": 11.534634,
            "statusCode": 200,
            "success": true,
            "error": null
        }
    }
}
We can notice the response contains the generated HTML for the Example view.
Implementing Hypernova Lambda
First, we need to install hypernova-lambda.
yarn add hypernova-lambda
We need to modify the entry point to use hypernova-lambda.
import { renderVue, Vue } from 'hypernova-vue'
import hypernova from 'hypernova-lambda'
import Example from './components/Example.vue'

const getComponent = (name) => {
  if (name === 'Example') {
    return renderVue(name, Vue.extend(Example))
  }
}

export const handler = (event, context, callback) => {
  hypernova(event, { getComponent }, callback)
}
We also need to remove the NodemonPlugin in webpack.config.js.
{
  ...
  plugins: [
    new VueLoaderPlugin(),
    new NodemonPlugin() // Remove Nodemon plugin
  ]
}
We can run the lambda function locally using the CLI:
ara run:lambda
Output:

Also, we can serve the client script locally using an S3 local server:
ara run:lambda --asset
Output:
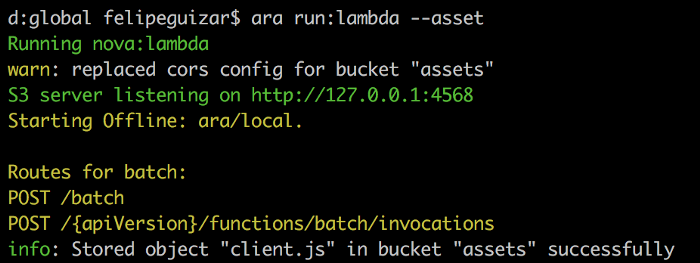
We can access to the client-side scripts using http://127.0.0.1:4568/assets/client.js
For this demo, we’ll test hypernova lambda locally. I won’t cover the deployment approach, it’s up to you.
GatsbyJS project
GatsbyJS has it’s own CLI to perform common tasks such as create a project, run a development server, build the website and more.
First, we need to install it:
npm install -g gatsby-cli
We can use the CLI to create a new project:
gatsby new gatsby-site
We can run the development server:
yarn develop
This command compiles the assets and runs a development server on http://localhost:8000/
Browser:
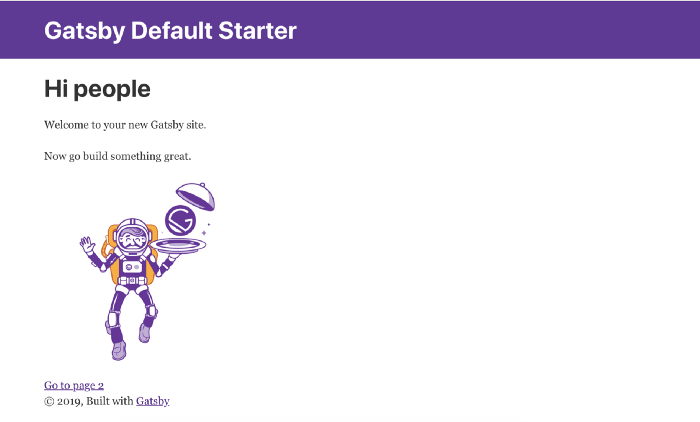
We have our Nova service and Gatsby running, it’s time to integrate our Example view into a Gatsby page.
Nova Bridge
The Nova bridge enables us to integrate and render Nova views using any view library like React.
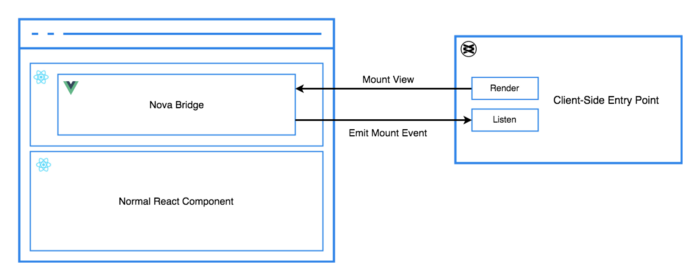
- The Nova Bridge emits a
NovaMountevent to let now to the Nova service that a view needs to be rendered and mounted. - The client-side entry point listens to the event and uses the event payload information to render the view.
- The client-side entry point mounts the rendered view in the Nova Bridge placeholder.
Implementing Nova Bridge
We need to install nova-react-bridge.
yarn add nova-react-bridge
Once the package is installed we can place a Nova view inside a React component. We’ll render the Example view on the home page.
The Nova component requires the name and data props.
<Nova name="Example" data={{ title: 'Ara Framework' }} />
We need to edit the file src/pages/index.js.
import React from "react"
import { Link } from "gatsby"

import Layout from "../components/layout"
import Image from "../components/image"
import SEO from "../components/seo"
import { Nova } from 'nova-react-bridge'

const IndexPage = () => (
  <Layout>
    <SEO title="Home" />
    <Nova name="Example" data={{ title: 'Ara Framework' }} />
    <h1>Hi people</h1>
    <p>Welcome to your new Gatsby site.</p>
    <p>Now go build something great.</p>
    <div style={{ maxWidth: `300px`, marginBottom: `1.45rem` }}>
      <Image />
    </div>
    <Link to="/page-2/">Go to page 2</Link>
  </Layout>
)

export default IndexPage
We also need to modify the client-side script in our Nova service to listen to the NovaMount event and mount the view. It’s located in novas/global/src/client.js.
import { renderInPlaceholder, Vue } from 'hypernova-vue'
import Example from './components/Example.vue'

const { document } = global

document.addEventListener('NovaMount', (event) => {
  const { detail: { name, id } } = event

  if (name === 'Example') {
    return renderInPlaceholder(name, Vue.extend(Example), id)
  }
})
The client-side entry point is pretty similar to the server. It uses the name and id from the event to render and mount the view.
Finally, we need to add the entry point script in the html.js file. GatsbyJS uses a default HTML template, so we need copy and override it.
cp .cache/default-html.js src/html.js
html.js
import React from "react"
import PropTypes from "prop-types"

export default function HTML(props) {
  return (
    <html {...props.htmlAttributes}>
      <head>
        <meta charSet="utf-8" />
        <meta httpEquiv="x-ua-compatible" content="ie=edge" />
        <meta
          name="viewport"
          content="width=device-width, initial-scale=1, shrink-to-fit=no"
        />
        {props.headComponents}
      </head>
      <body {...props.bodyAttributes}>
        {props.preBodyComponents}
        <noscript key="noscript" id="gatsby-noscript">
          This app works best with JavaScript enabled.
        </noscript>
        <div
          key={`body`}
          id="___gatsby"
          dangerouslySetInnerHTML={{ __html: props.body }}
        />
        {props.postBodyComponents}
        <script src="http://127.0.0.1:4568/assets/client.js"></script>
      </body>
    </html>
  )
}

HTML.propTypes = {
  htmlAttributes: PropTypes.object,
  headComponents: PropTypes.array,
  bodyAttributes: PropTypes.object,
  preBodyComponents: PropTypes.array,
  body: PropTypes.string,
  postBodyComponents: PropTypes.array,
}
We need to run the development server again.
yarn develop
The Example view shows a heading with the text “Ara Framework”.
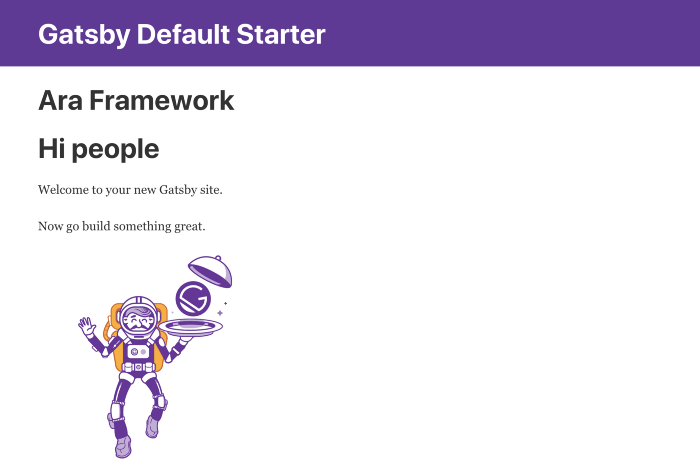
I know the Example view is so simple, let’s make it more interactive.
<template>
  <div>
    <h1>{{title}}</h1>
    <hr/>
    <div>
      <input type="text" v-model="title" placeholder="Type Something">
    </div>
    <br/>
  </div>
</template>

<script>
export default {
  props: ['title']
}
</script>
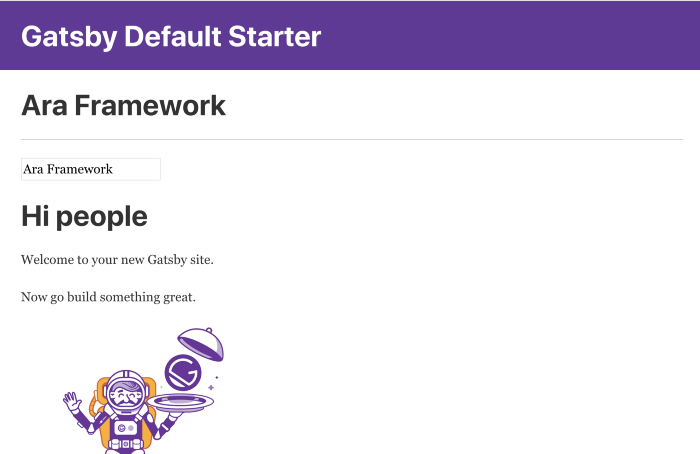
We added an input control to change the heading text. So let’s go to generate our static website.
Generating static website using GatsbyJS
First, we need to build our GatsbyJS project:
yarn build

This command created a folder named public that contains the generated files.
We can use the GatsbyJS CLI to run a server to consume the static files:
yarn serve
This command will run the server on http://localhost:9000. Looking at the generated HTML we can notice that GatsbyJS only renders the placeholder, it didn’t render the Nova view.

We need to use Nova Static to include the rendered views by the Nova service.
Include Nova views using Nova Static
Nova Static is a tool part of the Ara Framework that enables us to include Nova views in static HTML files.
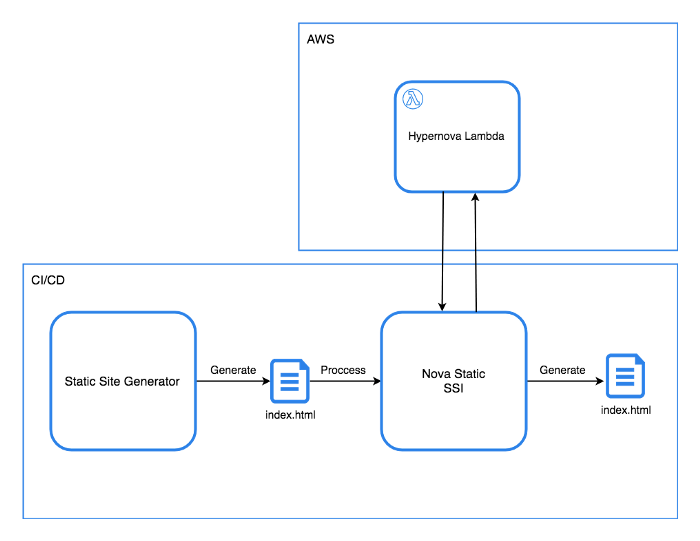
- The static site generator generates static files (HTML, CSS, JS, etc).
- Nova Static reads the HTML files.
- Nova Static parses and scrapes the HTML to create a request payload for the Nova service (Hypernova Lambda).
- Nova Static requests the Nova views to the Nova service.
- The Nova service server-side renders the views and sends them back to Nova Static.
- Nova Static replace the placeholders with the rendered HTML by the Nova service (Transclusion).
- Nova Static replaces the content of the HTML file with the new one.
Installing Nova Static
Nova Static is developed using Go, therefore we need to use in our CI/CD a container with GO installed.
We can install the executable:
export GOPATH=~/go

go get github.com/ara-framework/nova-static/nova-static

go install github.com/ara-framework/nova-static/nova-static

export PATH="$PATH:$GOPATH/bin"
The executable should be available running the command nova-static , we’ll use it next.
Running Nova Static
First, we need to define some environment variables:
HYPERNOVA_BATCH is the endpoint to requests views to the Nova service.
export HYPERNOVA_BATCH=http://localhost:3000/batch
STATIC_FOLDER is the folder that contains the static files.
/* Relative path from the gatsby project */
export STATIC_FOLDER=./public
Once the environment variables are exported we can run the nova-static command.
nova-static
Output:

Running the server we can notice the Nova views were included in the static files.
yarn serve
Rendered HTML:

The Nova view is also rendered when we disable the JavaScript in the browser. You can use this extension in Chrome.
Diabled JavaScript on browser:
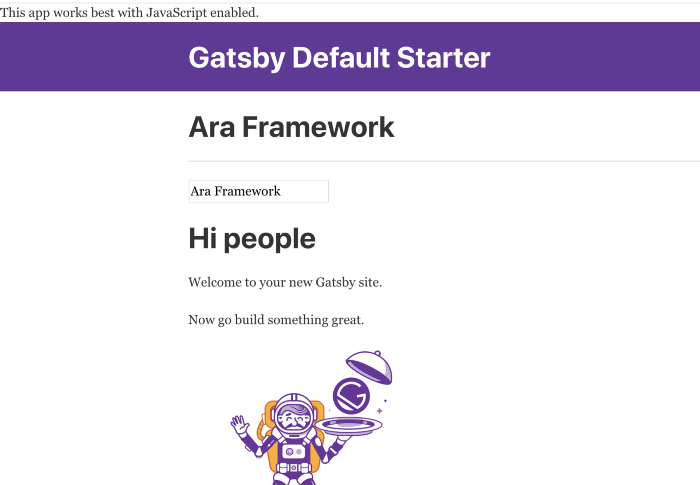
Another characteristic of Gatsby is the client-side routing. After the page is delivered in the browser the user navigates through the pages without load the page from the static files server.
Let’s add the Example into the page-2page.
import React from "react"
import { Link } from "gatsby"

import Layout from "../components/layout"
import SEO from "../components/seo"
import { Nova } from 'nova-react-bridge'

const SecondPage = () => (
  <Layout>
    <Nova name="Example" data={{ title: 'Page 2' }} />
    <SEO title="Page two" />
    <h1>Hi from the second page</h1>
    <p>Welcome to page 2</p>
    <Link to="/">Go back to the homepage</Link>
  </Layout>
)

export default SecondPage
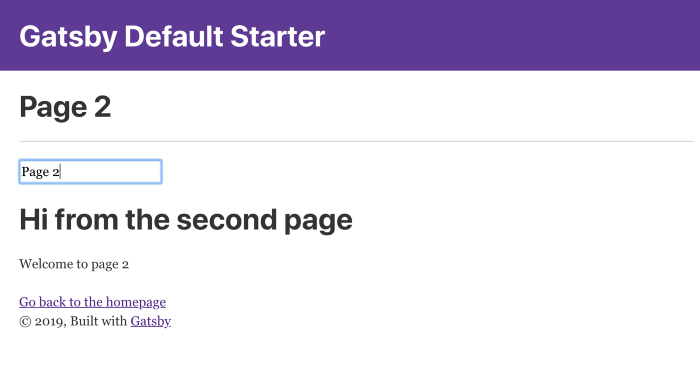
We can notice the Nova views are mounted after navigating to another page as well. Nova Bridge emits the NovaMount event every time a Nova view needs to be mounted. In this case, every time React mounts a Nova component.
Conclusion
Nova services using AWS Lambda are good companions for implementing JAMStack architectures. We can use them to render HTML during build-time and include them into the pages generated by any static site generator (Jekyll, Next, Nuxt, etc).
Nova Bridge gives us the flexibility to integrate Nova views at run-time. In this demo, we mounted VueJS views but we could delivery independent React views that are developed and deployed from other teams.
